Thursday, August 23, 2012

Tuscan White Beans with Bacon, Rosemary and Lemon


The weather this August has been uncharacteristically cool and that has me thinking of rustic autumnal food, particularly northern Italian food like slow-cooked Tuscan white beans.

I am a big fan of beans.  They are inexpensive and easy to prepare and are incredibly versatile.  This is one of my favorite preparations of white beans.  They are meaty and creamy and fragrant with rosemary, lemon, garlic and wine.

These beans can be used in a variety of ways.  I love to sprinkle them over salads or mix them into just about any pasta dish.  They are also exceptionally good when coarsely mashed and served on small slices of grilled bread as bruschetta.

This recipe is an all day affair, but the actual hands on time is minimal, mostly you will just sit around and wait for the beans to slowly cook in the oven while they fill the air with their incredible aroma.  Once prepared, they can be refrigerated and used in many different dishes.  I provide recipes for a  Tuscan white bean bruschetta and also a rustic Tuscan pasta dish with sausage, mushrooms and peppers.  YUM!

Penne pasta with sausage, peppers, mushrooms , spinach and Tuscan white beans

Tuscan white bean bruschetta with roasted red pepper

Tuscan White Beans with Bacon, Rosemary and Lemon
makes about 6 cups

1 lb dried canneloni beans
6 cups boiling water

1/2 pound bacon, cut into 1-inch pieces
1 medium onion, diced
1 head garlic peeled (about 12 cloves)
zest of one lemon
2 cups dry white wine (I used Pinot Grigio)
4 cups chicken stock
1 tsp salt
1/2 tsp freshly ground black pepper
4 large sprigs of fresh rosemary
juice of 1/2 lemon

Place dried beans in a large bowl and cover with boiling water. Let soak for one hour.

While beans are soaking, preheat oven to 250 F.  In a large heavy oven proof pan cook bacon over medium heat until fat is rendered and bacon is slightly crisp (about 20 minutes).

Add onion and whole garlic cloves and lemon zest to bacon and saute over medium heat, stirring frequently until onions are soft.  Add white wine, chicken stock and salt and pepper to pan and scrape up any brown bits from the bottom of the pan.

Before baking

Drain beans and add to pan.  Bring just to a boil and add rosemary sprigs.  Cover pan and transfer to oven.  Bake, undisturbed for 4-5 hours until beans are very tender and very little liquid remains (do not cook until dry).
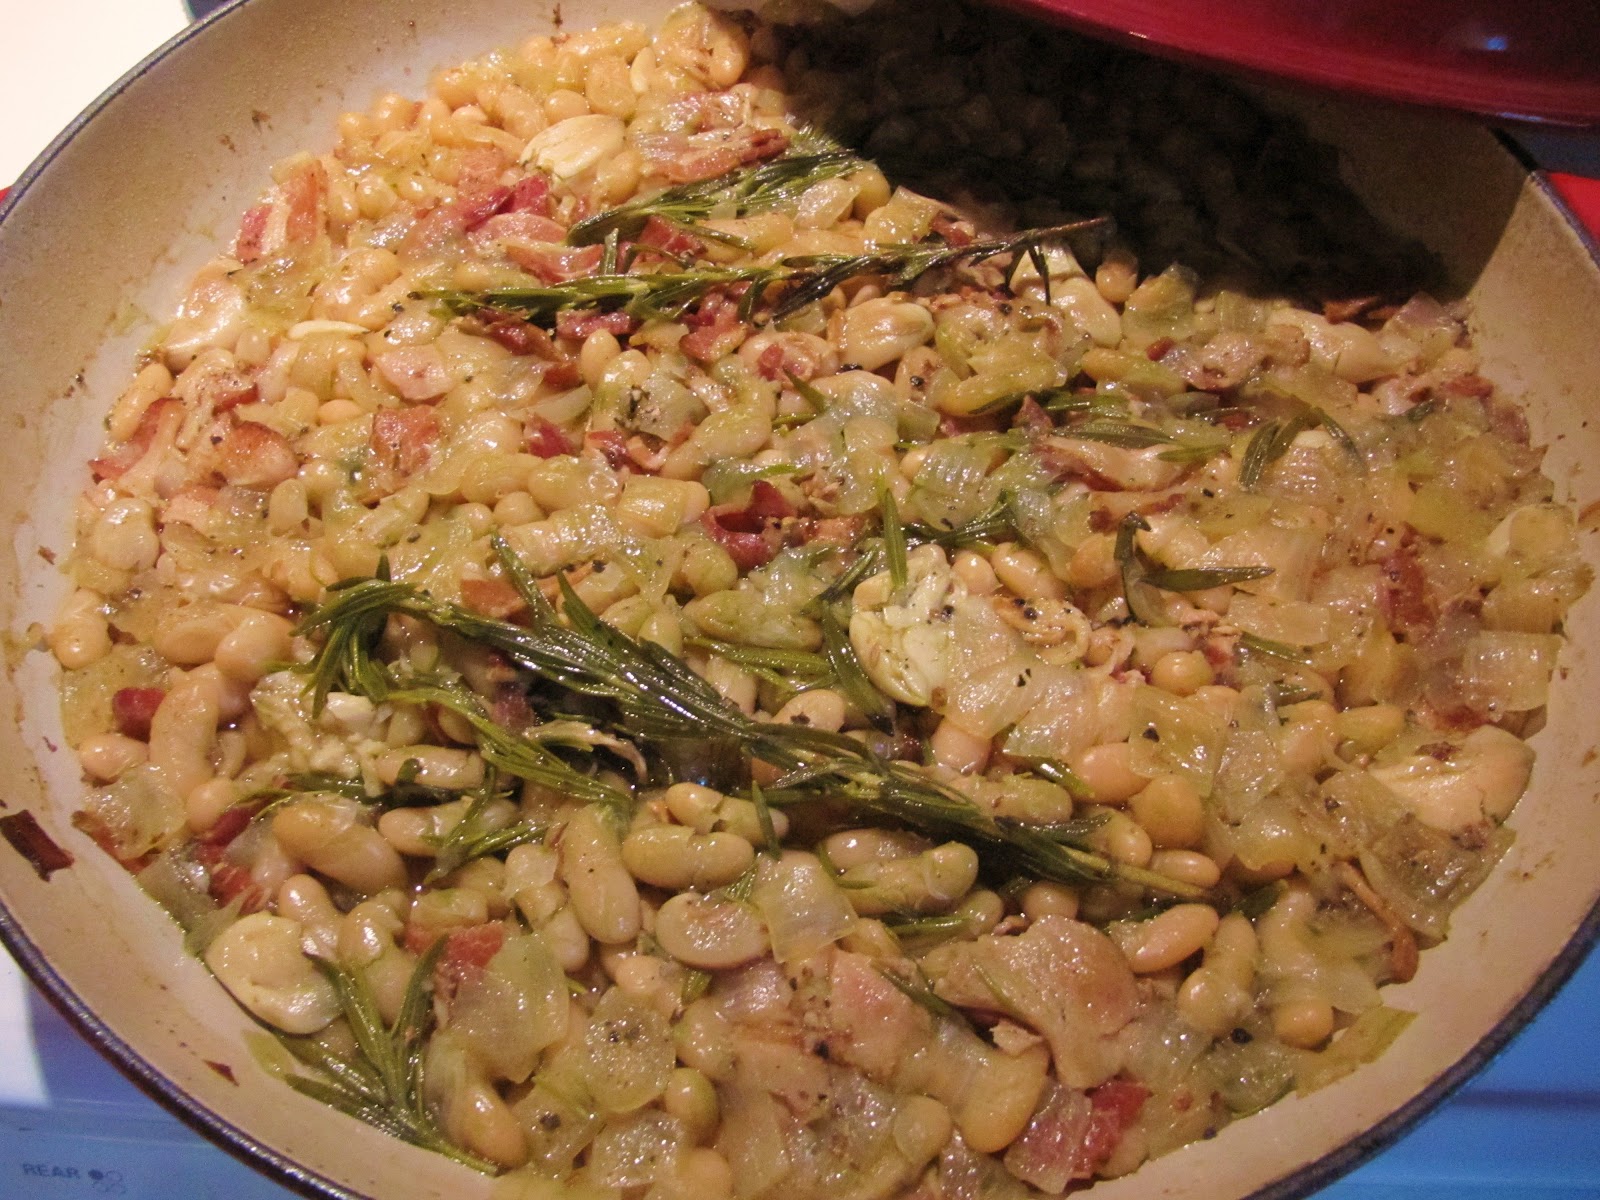
After 4 and half hours in a slow oven

Remove rosemary carefully from pan and discard.  Add juice of 1/2 lemon and gently mix in to beans.  Beans can be refrigerated for one week.

Tuscan White Bean Bruschetta

1 large red bell pepper
11/2 cups tuscan white beans
1 loaf garlic bread or baguette, sliced and grilled

Place pepper on grill over high flames and roast, turning occasionally until all sides are charred black.  Place roasted pepper in a paper bag and crimp top.  Allow pepper to steam until cool.  Remove charred skin and seeds. Slice pepper thinly.


Mash beans coarsely with a fork.  Serve atop slices of garlic bread or grilled baguette and garnish with roasted red pepper.

Penne with Sausage, Spinach, Mushrooms, Peppers and Tuscan White Beans

1lb penne pasta
2 Tbsp olive oil
1/4 tsp dried red pepper flakes
1 lb Italian sausage, casings removed and crumbled
1 small onion, diced
12 oz. sliced mushrooms
2 small red bell peppers, diced
2 cloves garlic, minced
2 small tomatoes, diced
9 oz. fresh baby spinach
1 cup reserved pasta cooking water
salt and pepper to taste
3 Tbsp olive oil (I particularly like porcini-infused olive oil)
juice of 1/2 lemon
salt and pepper to taste
grated parmesan cheese.

Bring a large pot of water to a boil. Cook penne according to package directions.

While water is heating, combine 2 Tbsp olive oil, red pepper flakes and sausage in a large skillet, brown sausage over medium-high heat.  Add onions, mushrooms and peppers to sausage and cook until onions and mushrooms are tender.  Add garlic and tomatoes and cook, stirring frequently until all the liquid has evaporated. Add fresh spinach and then add one cup reserved pasta cooking water over the spinach and toss until spinach is wilted.  Add cooked penne pasta and toss.  Season with salt and pepper and drizzle with porcini olive oil and fresh lemon juice. Let rest for 15-20 minutes, tossing occasionally, for pasta to absorb sauce and thicken.


To serve, place a mound of pasta in a shallow bowl and top with 1/2 cup Tuscan white beans.  Garnish with grated parmesan cheese.


Tuesday, August 14, 2012

Caramel Banana Pudding


Banana Pudding is a southern classic.  It is one of those desserts that if made properly, everyone eats and loves.  Because it is so revered in the annals of southern cooking there are as many recipes for it as there are people who love to eat it.  I present here my variation on this classic dessert.

The first thing I want to say is that until the age of 28 I absolutely LOATHED banana pudding.  This is probably because I grew up in the midwest where we don't know how to make banana pudding.  The only versions I ever encountered were made with banana-flavored instant pudding and slathered in cool whip.  I always associated banana pudding with artificial flavors and nasty gloppy pudding with soggy cheap cookies.

Then, in 1991 a fellow graduate student, Melissa, who lived next door to us in student village, made banana pudding, her grandmother's recipe.  She stopped by and said she had just taken it from the oven and asked if we wanted some.  I made a scrunchy face and said, "No...thanks.  I hate banana pudding".  When asked if I had ever had REAL banana pudding I became indignant and began to blather on and on about how revolting I thought it was.  My anti-banana pudding tirade continued until she just shoved a spoon of warm banana pudding in my open flapping mouth. I shut up immediately.

What I tasted was nothing like what I was accustomed to. It was sweet and buttery, and fragrant with vanilla and the amazing flavor of fresh bananas which in the homemade vanilla pudding began to exude their esters giving the dessert amazing overtones of rum and brown sugar.  The cookies were soft but not mushy and the meringue topping was light, barely sweet and ethereal like a warm cloud.  I had an epiphany.  THIS is what banana pudding should taste like, no wonder people love it!

I have been a convert ever since.  Like many of my southern friends, when I hear someone has made banana pudding, I begin to get excited, but cautiously... The interrogation of the cook begins.  "So, you made banana pudding?  Did you use banana-flavored pudding or vanilla pudding with bananas in it?  Did you make the pudding from scratch or is it from a box? Did you use meringue or whipped topping?"

There is one and ONLY ONE correct answer to these questions:  Home-made vanilla pudding with bananas in it, topped with meringue.

I also believe that banana pudding is best when it has had a chance to refrigerate overnight to let the flavors meld.  I usually prepare the pudding, cover it in plastic wrap and chill overnight, and add the meringue topping just before serving.

Since 1991 I have been making this pudding recipe and when I serve it, there is never anything left.  It is always the first thing to vanish and a potluck, so I recommend getting a serving early if you want to enjoy your creation.

So here is Melissa's grandmother's banana pudding recipe.  In this recipe I also added some Cajeta Caramel, but this is purely optional.  Cajeta ( kah-hey-tah) caramel is ubiquitous in latin america and is used as a topping for many deserts from ice cream to tres leches cake.  It is creamy and sweet and easy to make.  I think it adds a subtle caramel flavor which enhances the bananas and vanilla.

Another variation of this dessert substitutes peanut butter sandwich cookies for the vanilla wafers... delicious!

Banana Pudding is so iconic that local Chapel Hill band Southern Culture on the Skids has a song about it!  They even serve the audience banana pudding from the stage during a concert!


Caramel Banana Pudding
serves 12

Vanilla Pudding
1/3 cup flour
2/3 cup sugar
1/2 tsp salt
3 egg yolks
2 1/2 cups whole milk
3 Tbsp unsalted butter
1 tsp vanilla extract

1 box vanilla wafers
5-6 ripe bananas, cut into 1/4-inch slices

Meringue
6 egg whites
1/4 tsp cream of tartar
1/4 cup sugar

Cajeta Caramel
1 12 oz. can sweetened condensed milk

If you are using the cajeta caramel, make this first since it takes some time.  Place the unopened can of sweetened condensed milk ON IT'S SIDE in a large pot (this is to ensure that you don't get killed if the can explodes from the pressure of cooking).  Cover the can with water by about 2 inches.  Place on the stove on high heat and bring the water just to a boil.  Reduce heat to keep the water at a vigorous simmer and cook for 2 1/2 hours, replenishing the water periodically to keep the can submerged.

Remove the hot can from the water bath and allow to cool completely before opening.

Delicious cajeta caramel!

Now prepare the Vanilla Pudding.  In a large heavy-weight pot combine flour, sugar, salt and egg yolks, whisking to combine in a thick slurry.  Add the milk and whisk to combine.  Add the cold butter to the pot and cook over medium heat, stirring constantly until butter melts.  Continue to cook until the pudding becomes thick but still pourable (about 10-15 minutes).  Remove from heat and stir in vanilla.

If using caramel, spread half of the can in the bottom of an 11x7 glass baking dish. Place a single layer of vanilla wafers on top of the caramel.  Cover with banana slices.  Spread 1/2 of the hot pudding on top of the wafers.


Place a layer of vanilla wafers on top of the pudding and drizzle with the remaining caramel.  Top with bananas and the remaining pudding ( If using caramel, you will not use ALL of the pudding because it will overflow the dish!).

Cover with plastic wrap and refrigerate overnight.

Before serving remove pudding from refrigerator, remove plastic wrap and prepare meringue.

Place 6 egg whites in a large clean bowl and add 1/4 tsp cream of tartar.  Whip egg whites until very frothy, then, with mixer still running, slowly add the sugar to the egg whites.  Continue to whip egg whites until they are glossy and hold a stiff peak.

Spread the meringue over the pudding.  Be sure to allow the meringue to adhere to the sides of the glass dish or it will shrink up in the oven.

Place the pudding under the broiler and broil until the meringue is golden and brown and just set (about 2-3 minutes).


Monday, August 6, 2012

Tomato Tart with Herbed Goat Cheese


Well August is here and that means we are overflowing with beautiful multi-colored heirloom tomatoes from the victory garden. Our tomato plants are enormous gangly monsters, spreading everywhere and drooping from the weight of all the fruit! Pure joy!


 I love a vine ripened tomato, nothing in the world quite tastes the same! I have been enjoying these beauties on sandwiches and in salsa cruda, but decided it was time to bake them into a cheese-filled tart inspired by the flavors of the south of France.

 This tart is wonderful and fresh, fragrant with fresh herbs from the garden mixed with a tangy coat cheese chevre and topped with thick slices of sun-kissed heirloom tomatoes just picked from the garden. I put a layer of breadcrumbs and parmesan on top of the goat cheese and just under the fresh tomatoes to capture the juice from the tomatoes as they bake. My secret ingredient is a last minute drizzle of honey on top of the tomatoes, just a hint to help coax the natural sweetness out of the tomatoes. Divine.

 This tart is excellent warm or room temperature and makes a fantastic brunch dish or a light supper with a simple salad and a glass of chilled Rose wine.


Tomato Tart with Herbed Goat Cheese
serves 6-8

1, 9-inch circle of pie dough (I cheat and use commercially prepared, but feel free to make your favorite if you are so inclined)
5 oz. goat cheese chevre
1 tsp fresh thyme leaves
1 tsp fresh rosemary leaves
1 Tbsp fresh snipped chives
1/8 tsp sea salt
1/8 tsp freshly cracked black pepper
1 egg
2 Tbsp bread crumbs
2 Tbsp grated parmesan cheese, plus 1 Tbsp for topping
3 medium tomatoes, thickly sliced
1 tsp (about) honey

 Preheat oven to 350F.

Line a 8-inch metal tart pan with removable bottom with pie dough, folding over edges, and trimming excess. 

In a food processor combine goat cheese, herbs, salt pepper and egg, and process until smooth. Spread in dough-lined tart pan.


Top goat cheese with bread crumbs and parmesan cheese.


 Layer thick slices of tomato atop tart slightly overlapping. Drizzle lightly with honey and sprinkle with parmesan cheese.

This beauty is ready for the oven!

 Bake 40 minutes until golden brown. Allow to cool for 20 minutes before slicing.

Friday, July 27, 2012

Mama Ozzy's Magic Guacamole


Last night we had an impromptu party at the Tiki.  Some friends who we haven't seen in nearly 6 years were in town from Chicago and stopped by.  Doug and I decided to throw together a quick Mexican supper of:

Salsa Cruda (raw tomato salsa from the garden)
Smoked Corn and Black Bean Salsa
Mama Ozzy's magic guacamole
Spinach and Black Bean enchiladas
Pineapple Jalapeno Margaritas

I love guacamole, but I hate how after being exposed to the air causes it to turn black.  It's a natural thing due to enzymes in the flesh of the avacado decomposing amino acids (much like a banana turns brown).

I have seen all kinds of remedies for this..leaving the avacado seed in the guacamole (doesn't work and looks weird), using lemon juice...slows the process, but the guacamole still turns black.

I present to you here Mama Ozzy's magic guacamole that will not turn black, not even after an overnight refrigeration!  The solution is simple AND delicious.  Instead of lemon or lime juice in my guacamole, I use a pureed tomatillo.  It adds just the right amount of acidity to the guacamole and prevents it from turning black.

MAGIC!


Mama Ozzy's Magic Guacamole
makes about 2 cups

3 large ripe avacados
1 medium-sized green tomatillo, paper husk removed, cut into chunks
1 clove garlic, minced very finely (or 1/2 tsp garlic paste)
salt to taste

Peel and seed avacados.  Place in a large bowl and mash with a potato masher until desired smoothness (I like mine a little chunky).

In a food processor, puree the tomatillo until it is liquid.  Add to avacados and stir in.  Add garlic and salt, stir and serve.  This delicious guacamole will not turn black!

Monday, July 23, 2012

Panko-Crusted Fried Green Tomatoes


I need to confess something.

I LOVE FRIED GREEN TOMATOES.

There, I said it.  I love fried green tomatoes in all of their incarnations.  I have had them thick cut, thin cut, dredged in batter, dredged in cornmeal... all good.  I even love the movie Fried Green Tomatoes at the Whistlestop Cafe.  If it is ever on TV, I will watch it, no matter how far into the movie the programming is.


So now that we have established my obsession with fried green tomatoes, let me say, that this is hands down, the best preparation of fried green tomatoes I have EVER eaten.  EVER.

I first had them prepared this way at a restaurant called Founding Farmers, mere blocks from the Whitehouse on Pennsylvania Ave. in Washington D.C.  They are thick slices of juicy green tomatoes enrobed in a light flavorful crispy shell of fried panko breadcrumbs.  Once I had them, I had to come home and recreate the recipe.

These little beauties are the absolute essence of summer, since it is about the only time I can easily obtain green tomatoes.  I love to eat these on their own with a little lemon garlic aioli or , I love them slathered in pimento cheese, I love them on a sandwich with crispy bacon and fresh basil leaves and I love them just plain.

Bacon, Basil and Fried Green Tomatoes on Multigrain Bread.  
Shut the front door delicious!

I find these are much easier to prepare in a deep fryer, but a skillet will also work, just make certain to maintain a temperature of 350 or your little green 'maters will be greasy, and that would be a tragedy.

Panko-Crusted Fried Green Tomatoes
serves 4

4 medium-sized firm green tomatoes
1/2 cup flour
1/2 tsp salt
1/2 tsp garlic powder
1/2 tsp ground black pepper
2 eggs
2 Tbsp hot sauce
1- 2 cups panko bread crumbs
peanut oil for frying
waved paper

Slice tomatoes into 1/4-inch discs.

In a medium-sized bowl combine flour, salt, garlic powder and black pepper, stir to combine well.

In another medium bowl combine eggs and hot sauce, whisk to combine well.

In a third bowl, place the panko breadcrumbs.

Lay out a sheet of waxed paper.

dredge tomatoe slices in flour mixture, shaking off excess.  Dip in egg mixture making certain to completely coat the tomatoe slice.  Dip in panko breadcrumbs turning to coat evenly.

Place breaded slices on wax paper until ready to fry.

Pre heat oil to 350F.  Fry tomatoes in small batches (4-6 slices at a time), fliping them over from time to time, until they are crispy and golden brown.

Drain on paper towels, serve hot!


Summer Squash and Zucchini Pie


This weekend I decided it was time to post some of my favorite southern food favorites.  There is just something about summertime that makes me crave simple southern food.  At the top of the list is this simple and delicious summer squash and zucchini pie.  In late July the garden is overflowing with zucchini and summer squash and this is one of my favorite ways to prepare them.

This is basically a squash casserole baked in a pie crust. This recipe is sort of a cross between a quiche (but much less eggy) and squash casserole. To make things easy I use a prepared pie crust from the grocery store, but when I feel I have more time, I make my own pie crust... it's totally up to how you feel. Whatever you do , do not omit the crumbled butter crackers on the top... that's the best part!


I love to serve this pie with thick slices of garden fresh tomatoes and basil tossed in a simple vinnaigrette!  Welcome Summer!


Summer Squash and Zucchini Pie
serves 8

1 (generous) pound of yellow crookneck summer squash
1 (generous) pound of zucchini
1/2 red onion, chopped
1 Tbsp olive oil
8 oz. sharp cheddar cheese, grated
1 cup sour cream
2 eggs
1/2 tsp salt
1/2 tsp garlic powder
1/2 tsp ground black pepper
1/4 tsp nutmeg (preferably freshly grated)
1 9-inch pie shell, unbaked
1 cup crushed butter crackers (I like Ritz)
2 Tbsp butter

Chop zucchini and squash into 1/4-inch coins.  Place in a large glass microwave-safe bowl and cover with plastic wrap.  Microwave on high for 8 minutes.  Let vegetables cool to room temperature before removing plastic wrap (about one hour).

Transfer cooked vegetables to a clean cotton dish towel, and gather into a bundle.  In a collander over the sink squeeze as much water as you can out of the vegetables (otherwise pie will be soggy).

Pre heat oven to 350F.

Saute onions in olive oil over medium high heat until they just become soft and translucent.

In a large bowl combine onions, squash and zucchini with cheddar cheese, sour cream, eggs, salt, garlic powder, pepper and nutmeg.  Stir to combine well.

Line a 9-inch piepan with prepared pie crust.  Place squash filling in pie shell and spread to smooth.

Top with crumbled crackers and dot crackers with pats of butter.


Bake 40 minutes until golden brown.  Let pie rest 20 minutes before serving.  Serve hot or at room temperature.


Friday, July 20, 2012

Mama Ozzy's Jalapeno Pimento Cheese


It's been a long time since I posted any recipes!  I intend to change that over the next several days and weeks.  What have I been doing since my last post?  Enjoying my summer, that's what!  We spent a week with friends over the Fourth of July celebrating Doug's and my 50th birthdays (Doug's brthday is in April and mine is in October, so July is right in the middle).  The week was filled with lots of fantastic food, lots of time floating in the lake, riding jet skis and of course cocktails!

The weather here has been insanely hot, with many many consecutive days of 100 + degree temperatures.  When its that hot, I just don't feel like cooking and heating up the house.  However one thing I did make was this delicious pimento cheese.


Pimento cheese is a southern classic, and it seems every cook has a different way of preparing it.  Pimento cheese is making a trendy resurgence in the foodie scene.  I have seen it on grilled cheese sandwiches, topping Kobe beef burgers, adorning a plate of fried green tomatoes, and even mixed into a savory bread pudding.  I love it on crackers or a sandwich.

Here is my variation.  The first thing you will notice is that I don't use any pimentos in my pimento cheese.  While I love a roasted red pepper as much as the next person, I find that it's delicate flavor gets lost in pimento cheese and results in a rather bland final product.  I MUCH prefer using pickled jalapeno peppers.  Spicy and tangy, they make this cheese spread dance and sing! I also add a generous splash of Sriracha hot chili sauce for a little extra kick... DELICIOUS!

Delicious Sriracha (rooster sauce) is delicious on everything!

This is ridiculously easy to prepare.  If you can operate a food processor or use a cheese grater, you can make this pimento cheese.  It keeps for several weeks in the refrigerator, and is terrific for late night snacking with celery sticks!

Mama Ozzy's Jalapeno Pimento Cheese
makes about 3 cups

8 oz. sharp white cheddar cheese, grated
8 oz. pepper jack cheese, grated
1 small onion, coarsely chopped
1/4 - 1/2 cup chopped pickled jalapenos (depending on how spicy you like it)
1 - 1 1/2 cups prepared mayonnaise
salt and pepper to taste
1 Tbsp Sriracha hot sauce

In the bowl of a food processor combine the chopped onion and 1/2 of the pickled jalapenos. Process with 1/2 of the mayonnaise until very smooth.  Mixture will be very runny.

In a large bowl combine grated cheese, and jalapeno onion mixture.  Stir in remaining chopped pickled jalapenos and additional mayonnaise until your desired consistency is achieved.  Season to taste with salt pepper and Sriracha hot sauce.  Keep refrigerated.