If you know, you know.
Nothing makes a grilled Bratwurst or cheese steak taste better than putting it on a Sheboygan Hard Roll. They are simply the best. Light, crusty, full of flavor, nothing even compares. The best ones come from Johnston’s Bakery or City Bakery in Sheboygan Wisconsin.
Unfortunately I live 1000 miles away from Sheboygan WI and can only get them by mail order, which is good, but I want them fresh from the oven and that means learning to make them myself.
This summer I set out on a quest to develop a recipe for authentic bakery-style hard rolls for the home baker. I began with a recipe for German Brötchen, a fussy recipe that involves making an overnight poolish, and then many hours of prep the following day. The result was beautiful, tasty and wrong. The rolls were too dense, and just didn’t have the right flavor. Back to the drawing board.
A friend of mine Corrine Heyeck, suggested that I join a Facebook group called Artisan Bread Bakers, for further research. I travelled down several rabbit holes in this excellent group and eventually found the recipe that would serve as my base recipe.
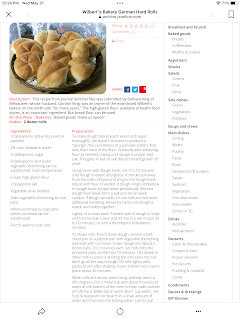
The base recipe was found in the Milwaukee Journel Sentinel archives and was glitchy and slow loading. Thankfully I snagged a screenshot of the original recipe.
The original recipe needed a little work to get it ready for a home baker to produce consistent results. First of all the recipe calls for “high gluten flour “ which is t readily available to most home bakers. High gluten flour has 14% protein. In order to remedy this, I added vital wheat gluten (VWG) to bring my flour up to 14%. This required a little math and you will likely have to do the same unless you are using the flour I used: King Arthur Bread Flour.
Do not skimp on the 12-minute kneading time, you want to develop all that gluten! Keep a small bowl of flour and another of spring water for final adjustments to the dough. As you get more adept with this recipe you will begin to know what the dough should look like and how to tweak it to get there.
Another trick I used was to oil a coat hanger that has a wooden dowel on the horizontal bar to make the indentations in the dough. Super easy.
Sheboygan Hard rolls
Flour 555g
Water 413g
Hydration 74%
500g King Arthur Baking flour (12.7% protein)
6.5 g Vital Wheat Gluten
2 tsp diastatic malt powder
370 g spring water ( not city or tap; 74% hydration)
3Tbsp unsalted butter ( or lard or vegetable shortening)
1 1/2 Tbsp instant rapid rise yeast
1 tsp table salt
Spray vegetable oil
Fine ground yellow cornmeal or semolina flour for dusting baking sheet
1/2 tsp corn starch dissolved in 1/2 tsp cold water
1 cup boiling water
Additional boiling water for steam
In the bowl of a stand mixer with the hook attachment combine flour, vital wheat gluten, diastatic malt powder, spring water, butter, and yeast. Mix on medium low speed until a dough begins to form. Add salt. Continue to knead on medium low for 12 minutes until a smooth, elastic and tacky dough forms. The dough should not stick to the sides of the bowl, but will stick to the bottom of the bowl.
After kneading, transfer dough to a lightly oiled container, cover with a kitchen towel and rise until quadrupled (30-60 minutes in my kitchen, yours will probably differ).
Preheat oven to 425° F. Place a baking stone on a shelf in the upper half of your oven. On the rack directly below the baking stone, place a cast iron skillets this will receive boiling water for the steam bake.
Generously grease a half baking sheet with butter, and dust completely with cornmeal or semolina.
Gently deflate dough, and turn out on a very lightly floured surface
Divide the dough as equally as possible into 12 pieces. Form each piece onto a smooth ball of dough and place on prepared baking sheet. Spray rolls lightly with oil.
Lightly oil a 12- inch dowel and use it to press an indentation into the rolls, four at a time, pressing down firmly, but not cutting rolls in half.
Cover rolls with a kitchen towel and proof for about 45 minutes ( or until the rolls have dramatically risen at least doubling in volume) at room temp. Again, different kitchens will require different proof times.
Bring a kettle of water to a boil.
After rolls have risen, uncover rolls. Combine corn starch and cold water, then pour into one cup of boiling water and stir until smooth. Brush rolls with starch wash immediately before putting in oven.
After putting buns in the oven, add 1 1/2 cups boiling water to cast iron skillet and immediately close oven. Bake for 5 minutes, then remove skillet of water. Continue to bake 13- 20 minutes until rolls are well risen, golden brown and sound hollow when thumped.
Remove rolls from oven and transfer them to a wire cooling rack to cool. The rolls will become soft, which is what you want.
Serve same day, or put lukewarm rolls in a plastic bag and freeze while still tepid.


No comments:
Post a Comment