Pages

Monday, December 31, 2012

Shrimp and Bacon Puffs


Happy New Year's Eve!

This is my last blog post of 2012 and I thought I would share a delicious and easy little appetizer.  For me New Year's Eve is all about finger foods, and hooch... and maybe not necessarily in that order, but you get the picture.

This year I decided to throw together these super easy shrimp and bacon puffs.  They come together very quickly, can easily be made a day or two ahead of time and just baked right before serving.  The perfect thing for a cocktail party!  The seafood and bacon combo is really delicious and everyone loves the buttery puff pastry.  YUM

I hope y'all have a safe and tasty New Year's eve, and I will see you online next year!

Love,
Mama Ozzy

Shrimp and Bacon Puffs
makes 2 dozen

1 lb cooked shrimp, peeled and deveined
8 oz. cream cheese, room temperature
1/4 cup mayonnaise
1/2 cup grated parmesan cheese
1 Tsp worcestershire sauce
1/2 tsp freshly cracked black pepper
1/8 tsp cayenne pepper
6 slices bacon, fried until crisp
3- 4 scallions, finely chopped

1 package frozen puff pastry (2 ready to bake sheets; I used Pepperidge Farms), thawed in the refrigerator.

In the bowl of a food processor fitted with the chopping blade, mince the shrimp until finely chopped.  Transfer minced shrimp to a large bowl.

Minced shrimp

In the same work bowl of the food processor combine cream cheese, mayonnaise, parmesan, worcestershire sauce, black pepper and cayenne pepper.  Process until very smooth.  Crumble bacon into cheese mixture and process briefly until well combined.

Add cheese mixture to shrimp.  Add chopped scallions and stir until well mixed.

On a work surface, unfold one square of puff pastry dough.  Spread half of filling evenly atop puff pastry, and then roll up jelly-roll-style.  Repeat with remaining square of puff pastry.

Filling spread over the puff pastry...

Then rolled up like a jelly roll, ready to slice

Slice each roll into 12 equal pieces and place on a baking sheet lined with parchment paper.

At this point puffs can be covered and kept refrigerated until ready to bake.

Ready to bake!

Preheat oven to 400 F.  Bake puffs for 20-30 minutes until centers are baked and golden.  Serve hot or at room temperature.


Sunday, December 23, 2012

Christmas Menu 2012

Well it's the mad rush for Christmas and things, as always are a frenzy around here as we complete our last minute shopping, wrapping and of course menu plans.

Christmas is an all day pajama fest at our house and though we like to serve really special food, we also like to keep it simple because nobody wants to spend all day in the kitchen.

We are making all of our favorite traditional  Christmas foods which, with a little pre-planning, can be quickly put together with minimal cooking time.

Here is our menu, and links to the recipes.  I'd love to hear what special things You are making, so send Mama Ozzy some Christmas love and drop me a comment on what are your family traditions!

Christmas breakfast around the tree:
Raspberry Chocolate Chip Muffins
Savory Breakfast Bread Pudding
Hot Chocolate with Peppermint Marshmallows
Irish coffee and Mimosas

Christmas Dinner:
Wild Mushroom Tart with Smoked Gouda
Beef Tenderloin with Morel Mushroom Bordelaise
Garlic Mashed Potatoes
Haricots Verts in Brown Butter with Almonds (recipe follows)
Chocolate Ganache Tart with Raspberries
Ginger Pear Fizz

So it occurs to me that I have never posted my Haricots Vert recipe.  Haricots Vert are thin french green beans.  I like my beans to be tender, bright emerald green and still have a good crunch to them (mushy, olive-drab beans suck!).

I prepare them by bringing a large pot of salted water to a vigorous boil.  Add all the beans (about 2lbs).  Wait until the water just returns to a boil.  Drain and immediately plunge the beans in a large bowl of ice water (this will stop them from cooking and preserve a nice crunch).  Drain the beans and store for up to two days in a plastic bag.

The day of serving, melt 1/2 cup butter in a large skillet.  Add 1 cup sliced almonds and cook until lightly browned, tossing occasionally.  Add the cold blanched beans and stir fry until just heated through (about 5 minutes). Serve.

Merry Christmas and Happy Holidays!

Mama Ozzy

Monday, December 17, 2012

Maple Bacon Caramel Popcorn


I have been making caramel popcorn ever since college when my (now) sister-in-law Kathy taught me to make it.  I was amazed it was so easy to make homemade caramel popcorn.

This year we decided to mix things up a bit and add maple syrup and bacon to the mix.  The result tastes like a big pile of delicious pancakes and bacon dripping with butter and maple syrup.  So if you don't like that, then this recipe is not for you.

For the rest of you let me tell you the internet is full of recipes for maple bacon caramel popcorn.  LOTS of them.  My complaint with these recipes is that there is not enough caramel sauce to glaze the popcorn adequately, not enough bacon, not enough nuts, not enough of any of the good stuff.  Caramel popcorn should be coated with caramel, not just sprinkled with it.  Caramel popcorn is by no means a health food, so if you are going to make it, go whole hog.

My recipe results in a nice candied popcorn with lots of bacon bits and nuts.  It will keep for a week or so (if you can stand having it in the house and don't eat it immediately) if you keep it wrapped tightly and don't let humidity get to it.

Maple Bacon Caramel Popcorn
makes about 8 cups

3 Tbsp vegetable oil
1/2 cup popcorn kernels

1/2 lb bacon, fried until crisp and finely chopped
1 cup pecans, medium chop
1 cup honey roasted peanuts

1 cup (2 sticks) salted butter
2 cups light brown sugar
1/2 cup light corn syrup
1/2 cup maple syrup
1 tsp baking soda

Preheat oven to 250 F.

Line a jelly roll pan with foil and spray lightly with oil.

In a large pot with a lid heat the oil over medium high heat.  Add the popcorn and cook with agitation until popcorn pops, being careful not to burn.

Empty /2 the popcorn onto the baking sheet and sprinkle with 1/2 the pecans, peanuts and bacon.  Top with remaining popcorn and nuts and bacon.

In a medium sauce pan melt butter over medium high heat.  Add brown sugar, corn syrup and maple syrup.  Cook with stirring until mixture just begins to bubble.  Stop stirring and cook until mixture reaches the soft ball stage (238 F on a candy thermometer).

Remove pan from heat and add baking soda and stir, mixture will foam up violently.  Pour molten caramel over popcorn.

Bake 45 minutes, tossing with a spatula to coat all the popcorn evenly every 15 minutes.

Allow to cool before packing into an airtight container.

Pour the molten caramel over the popcorn...

Every 15 minutes toss to coat popcorn evenly

Melomakaronas (Greek Honey and Walnut Cookies with Orange)


It is one week before Christmas Eve and I decided there was time to post a couple new cookie recipes before the holidays are upon us.

Going through my collection of cookie recipes I have amassed over the years, I came across this recipe I had scribbled down in the late 1980's and haven't made since.  I had annotated this recipe as "delicious, but a lot of work", which is a big part of why I had not made these in 20+ years.  For one thing, these should be baked on parchment paper.

I don't know why the words parchment paper strike such fear into the hearts of bakers.  Parchment paper is wonderful stuff because absolutely nothing sticks to it.  It is not expensive, and these days is really easy to find in most grocery stores.  I have begun baking most of my cookies on parchment paper because I never have to worry about sticking and clean up is a snap!

I am a much better cook now than I was back in the early days.  A big part of the improvement in my cooking comes from the fact that I am now a much more organized cook than I was 20 years ago, and making these cookies this morning was a perfect example of how organization can make a difficult recipe much easier.

Melomakaronas are a traditional Greek Christmas cookie, and one bite will convince you they are worth the effort that goes into them.  They taste something like a cross between a delicate cake-like shortbread and baklava.  They keep extremely well and only get better with age, becoming more flaky and and tender and fragrant with time.

The individual components themselves are not terribly difficult to make (though you will go through quite a few bowls), but rather it is the final step where the HOT cookies are soaked in the cinnamon infused honey syrup that is a bit of a pain (literally...hot cookies = burnt fingers).  But using fork and a gentle hand makes the task a little less painful.

I hope you will try these rustic yet sophisticated little beauties.  They add a very nice diversity to the standard Christmas cookie plate, and if your family is like mine, they will be among the first to disappear!

Melomakaronas
makes about 4 dozen

Cookies
2 3/4 cups flour
1/4 tsp baking powder
1/4 tsp salt
1/4 tsp ground cinnamon
1 cup vegetable oil (or olive oil if you like a more earthy taste)
1/2 cup unsalted butter (1 stick), melted
1 egg yolk
1/4 cup sugar
grated orange zest of 1 large orange
2 Tbsp orange juice
1/8 tsp baking soda
1/2 cup chopped walnuts

Syrup
1 cup water
1/2 cup sugar
1 stick cinnamon
1/2 cup honey

Finishing
1/2 cup chopped walnuts

Preheat oven to 350F.

Combine flour, baking powder, salt and cinnamon in a bowl, whisk to combine.

In a separate bowl combine oil, butter and egg yolk and whisk until well-combined.  Add sugar and whisk to combine.

In a small bowl combine orange juice and baking soda, then add to oil mixture and whisk to combine.

Add nuts to oil mixture and stir.  Add dry ingredients and mix until dough pulls together into a soft dough.

Roll dough into walnut-sized balls and place on a parchment paper- lined baking sheet.


Bake 30 minutes.

Dough balls on parchment, ready for the oven...

Hot cookies from the oven, ready to be soaked in syrup!

While cookies are baking make syrup.  In a small sauce pan combine water sugar and cinnamon stick.  Heat over high heat, stirring until syrup comes to a boil.  Reduce heat to medium low and simmer for 20 minutes.  Add honey and stir in.

When cookies are finished baking, using a fork transfer hot cookies, a few at a time, to the syrup and flip over 2-3 times to soak the cookies.


With your fingers, remove the cookies from the syrup and let excess drip back into pan.  Dip the wet cookie into the chopped walnuts and place on a baking rack over waxed paper to cool.

Store in an airtight container.

Saturday, December 8, 2012

Peppermint Marshmallows


This year we decided to make a lot of different kinds of candy for gift giving.  Since many of our packages have to be mailed we wanted things that can stand up to the wear and tear of mail handling.  Cookies always seem to break, but candy can take a beating and still show up looking good.

I always make English toffee for Christmas, but this year we decided to try something new.  I remembered a great recipe for homemade marshmallows in an old issue of Gourmet magazine (have I mentioned how much I miss Gourmet magazine?) and decided to give them a go.  Brilliant!  The end product far exceeded my expectations and I think I will make these every year from here on out.

These homemade marshmallows are really excellent, both for eating and for shipping.  They are ridiculously easy to make once you get yourself organized.  While I imagine these can be prepared with a hand mixer, a stand mixer fitted with the whisk attachment is definitely the way to go with these.

The marshmallows can be flavored in many ways, but we decided on a soft peppermint flavor.  I recommend just eating these plain, tossing them into a hot cup of cocoa, or dipping them in chocolate fondue!  YUM

Peppermint Marshmallows
makes about 6 dozen

3 1/2 packages unflavored gelatin (this adds up to 3.5 oz.)
1/2 cup cold water

2 cups granulated sugar
1/2 cup light corn syrup
1/2 cup hot water
1/4 tsp salt
2 large egg whites
1/2 tsp vanilla
1/2 tsp peppermint extract
several drops red food coloring

Powdered sugar

Lightly oil a 9x13 baking pan and dust generously with powdered sugar.


In the bowl of a stand mixture sprinkle the gelatin over the cold water and let stand for 10 minutes to hydrate.

While the gelatin is softening, combine the sugar, corn syrup, hot water and salt in a heavy medium saucepan and cook over medium high heat, stirring with a wooden spoon until the sugar is dissolved.

On the sugar is dissolved, bring the mixture to a boil and cook over medium high heat until it reaches the "soft ball stage" 240F.  This will take about 10 minutes, but watch carefully so as not to overshoot the target temperature.

Once the sugar reaches 240F, immediately remove from heat.  Turn the mixer on high and steadily pour the hot syrup into the softened gelatin.  Continue to whip this mixture until it triples in volume, about 5 minutes.

While mixture is whipping, in a separate bowl whip the egg whites until they just hold a peak.  Add the vanilla and peppermint extract and the food coloring and whisk just to combine.


Add the egg whites to the work bowl containing the marshmallow and whip on high until everything is just combined.

Pour the mixture into the prepared pan,spreading to all the corners with a lightly oiled spatula.  Sift powdered sugar over top and let it cool, uncovered for at least 3 hours to overnight


Once cooled, run a knife around the edge of the pan and with your fingers pick up one edge of the marshmallows.  Invert this onto a cutting board.

Cut the marshmallows into 1-inch cubes with a lightly oiled knife or pizza cutter.  Toss the cubes in powdered sugar to coat and store in an air-tight container.


Potato Pancakes (Latkes)


I first saw this recipe for Potato Latkes in Food and Wine Magazine a couple years ago.  It was contributed by F&W editor Gail Simmons (of Top Chef fame) as part of her perfect Hanukkah celebration.

These are perfect latkes.  They are crisp and crunchy on the outside and soft and chewy on the inside.  Too often potato pancakes are dense and heavy and greasy, but not these.  The trick is to squeeze out as much water from the potatoes and onions as possible before making the batter.  It is also important to maintain the right oil temperature during frying, too hot will burn the pancakes, too low will result in a doughy greasy lump.

I use the grating disc on my food processor to grate the potatoes and onions which makes this usually tedious chore a breeze.  I also fry them in a heavy non-stick skillet so I never have an issue of them sticking to the pan.

I like to serve these the traditional way, with sour cream and applesauce, but they are also an excellent foil for smoked salmon or seared scallops.

Potato Pancakes (Latkes)
makes about 24

3 1/2 pound Russet potatoes, peeled
2 large onions, peeled
2 eggs
1/2 cup flour
1/4 tsp baking powder
1 1/2 tsp salt

1 cup vegetable oil (for frying)

Preheat the oven to 200F.

Grate the potatoes and onions and place them in a colander.  With your hands, firmly squeeze the potatoes and onions to remove as much water as possible.

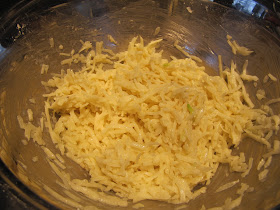
Grated potatoes and onions ready for squeezing

In a large bowl combine potatoes, onions, eggs, flour baking powder and salt.  Mix together well, then transfer mixture back to the colander and put it over the mixing bowl.  Let rest for 5 minutes. (This step removes any excess batter from the mix, keeping your pancakes light and crisp).

Mix the potatoes and onions with the remaining ingredients to make batter...

Then let that batter drain through a colander into the mixing bowl.

While pancake batter is resting, heat oil in a large non-stick skillet over medium high heat for 5 minutes.

Drop about 1/4 cup of batter gently into the hot oil and gently spread it with your spatula to make a pancake.  NOW LEAVE IT ALONE.  Do NOT poke at it.  Let it fry undisturbed until the edges of the pancake appear golden brown, about 3-4 minutes.

Pancakes should sizzle immediately when added to the oil

When the edges of the pancake are golden, then it is time to flip them

Only when the edges of the pancake are golden, should you flip the pancake with a spatula.  Fry the other side until golden brown.  Remove pancakes to a baking sheet lined with paper towels and place in the preheated oven to keep warm until ready to serve.

Serve hot with sour cream and applesauce.

Tools for success:

Friday, December 7, 2012

Potato, Cheddar and Caramelized Onion Pierogis


I grew up in Michigan, and one thing Michigan has is a LOT of Polish people.  Being Czech, I was often mistaken for being Polish since my last name ends in "sky".  I always had to correct people that Polish names end in "ski" not "sky".  Not that any of this really mattered since the two countries are right next to each other, but people from Michigan are offended when being mistaken for being from Ohio (and vice versa ) so I suppose you can understand.

ANYWAY... one thing we had a lot of in Northern Michigan (besides Polish people) was potatoes.  The town of Posen Michigan, hosts the annual Potato Festival and there you can go to feast on homemade potato pancakes and pierogis!  Heaven.


A pierogi is basically a dumpling wrapper filled with mashed potatoes or cabbage.  They can be boiled or fried or boiled, THEN fried, but they are always a delicious morsel of earthy eastern European goodness.  I prefer to prepare them like Chinese pot stickers, so they are steamed while the bottom of the dumpling fries to a golden crispy brown.

These used to be a LOT of work back in the day when my mother had to make the dough from scratch, roll it out, cut, and then fill it.  Now I can buy Chinese dumpling wrappers (which are exactly the same thing as pierogi dough) in the grocery store so preparing these is a snap!

The best thing about these is if you lay them out on a cookie sheet, you can freeze them and then store them in a large plastic bag for whenever you have the craving for pierogis.  Just toss the frozen pierogi in the pan and cook them in 8-10 minutes!

Potato, Cheddar and Caramelized Onion Pierogis
makes about 24

2 or 3 large russet potatoes, peeled and cut into large chunks
1 large clove garlic
4 Tbsp butter
milk
salt and pepper
2 Medium yellow onions, diced
2 Tbsp olive oil
8 oz. sharp white cheddar

Round Chinese dumpling wrappers (available at most Asian markets)

For Cooking the Pierogi
4 Tbsp butter
1/3 cup water

In a large pot, cover the potato chunks with water and bring to a boil.  Add the garlic clove and boil until potatoes are tender.

Drain potatoes and in return them to the cooking pot.  Add Butter and mash potatoes.  Add milk and whisk until desired consistency.  Season with Salt and Pepper.

In a large skillet over medium heat slowly cook the diced onions in oil, stirring occasionally, until they are golden brown, about 30 minutes.

In a bowl combine mashed potatoes, caramelized onions and grated cheddar.  Mix until well-combined.

Place dumpling wrappers on a clean kitchen towel and place about 1 Tbsp of filling on each wrapper.  With a pastry brush, gently moisten the edges of the wrapper and seal by pinching edges together.

Filling the pierogis...


Place on a large baking sheet and freeze until ready to cook.

Pierogis arranged on a baking sheet and ready to be flash frozen

After they are frozen, pack the pierogis in a plastic bag and keep in the freezer

To Cook Pierogis:
 Melt 4 Tbsp butter in a large heavy non-stick skillet over medium high heat.  Add frozen pierogis, being careful not to crowd or overlap the pierogis and add water.  Immediately cover skillet with lid to trap the steam and cook over medium high heat  for 4 minutes.  After 4 minutes, remove lid, gently flip the pierogi and fry about 4 more minutes until bottom of pierogis are crunchy and golden brown.

Serve hot with sour cream.


Thursday, December 6, 2012

Mama Ozzy's Stuffed Cabbage Rolls (Holubky)


Being Eastern European, I think I have a natural affinity for cabbage.  I love the stuff.  I think Cabbage is incredibly versatile, it can be eaten raw, sauteed, stewed, fermented, pickled and perhaps my favorite, stuffed.

Stuffed cabbage is one of those comfort foods that just makes me happy.  It reminds me of home and my Czech/German mother.  Eating this dish feels like I have been transported back to the old country in a place long ago and far away...  In Czech stuffed cabbage is holubky, in Polish, golabki, but either way it translates to delicious!

There are perhaps as many ways to prepare stuffed cabbage as there are grandmothers who cook it.  This is my version.  I like mine to be slightly sweet and fragrant with spices.  And for me, you must use Savoy cabbage which has a much more delicate flavor than regular cabbage.

Essentially stuffed cabbage is simply meatloaf stuffed inside a cabbage leaf, rolled up like a burrito and braised in tomato sauce.  But the components of the meatloaf mixture are where the magic lies.  Instead of breadcrumbs I use crushed gingersnap cookies which makes a very slightly sweet filling that is fragrant with cinnamon and ginger.  YUM!

I also add dried currants to the tomato sauce.  This may sound strange, but trust me on this, it is wonderful and truly transforms the dish.  A dollop of sour cream finishes off the dish perfectly.

These can be made any time of the year and are paradoxically light and hearty at the same time making them perfect for both the winter and summer table.

Mama Ozzy's Stuffed Cabbage Rolls (Holubky)
serves 6-8

1 large head Savoy cabbage

Filling
1 large carrot, peeled and grated finely
1 large parsnip, peeled and grated finely
1 medium onion, diced finely
1 stalk celery finely diced
1 clove garlic, minced
3 Tbsp olive oil
1 1/2 tsp salt
1/2 tsp fresh cracked black pepper
1 tsp paprika
2 Tbsp tomato paste
1/2 lb ground beef
1/2 pound ground pork (use all beef if keeping kosher)
1 cup gingersnap cookies, finely crushed
1/2 cup uncooked rice
2 eggs

Sauce
2 medium onions chopped
2 Tbsp olive oil
1/4 cup dried currants (or raisins)
1 Tbsp brown sugar
2 Tbsp red wine vinegar
1, 28 oz. can prepared tomato sauce

Preheat oven to 350F.

Bring a tea kettle full of water to a full boil.  While water is heating, prepare cabbage by removing the tough damaged outer leaves and the tough stem by cutting a large cone-shaped well in the bottom of the cabbage.

Invert the cabbage, bottom side up in a very large bowl capable of submerging the entire cabbage.  Pour the boiling water into the well in the bottom of the cabbage and cover the cabbage completely in boiling water.  Set aside and allow the cabbage to blanch until cool enough to handle, about 30 minutes.

Let the cabbage blanche in the boiling water while 
you do other things... like make pierogi!

Meanwhile prepare the meat filling and sauce.

For the filling: heat 3 Tbsp olive oil in a large skillet.  Add carrot, parsnip, onion, celery and garlic and cook over medium high heat until softened, taking care not to scorch the garlic.

Add salt, pepper, paprika and tomato paste to vegetables and stir to combine, remove from heat.

In a clean bowl, combine beef, pork, cooked vegetable mix, gingersnaps, rice and eggs and mix with your hands until well-mixed.

For the sauce:  Saute the onions and currants in the olive oil until onion is translucent.  Add brown sugar and cook until just beginning to caramelize, then de-glaze with vinegar.  Add canned tomato sauce and cook until it just begins to bubble.  Remove from heat.

For Assembly;
Drain the cabbage thoroughly, then carefully separate the leaves and blot dry on paper toweling. With a paring knife make a "V-shaped" notch in the base of each leaf to remove the remaining tough stem.


Place about 1/4 cup filling on each leaf, fold the side over and roll up like a burrito or egg roll.


Spread about 2 cups of the tomato sauce in the bottom of a large heavy baking dish with a lid.


Top with a layer of unused cabbage leaves (if any).  Place assembled cabbage rolls on top of the layer of leaves, seam side down.


Pour remaining sauce over cabbage rolls.


Cover tightly with lid or aluminum foil and bake for 1 hour and 15 minutes. Serve hot with sour cream and potato pierogis.

Thursday, November 29, 2012

Warm Apple and Cream Tart

                                                                                                               Photography by Rachel Horesovsky

I really love a quick and easy apple tart and this recipe, based on one I found from legendary french cookbook author Patricia Wells is one of my all time go to recipes.  This apple tart is warm and homey and is the absolute essence of French comfort food.

This is the kind of tart that can be prepared on a moment's notice, like when you find out you have company coming for dinner in 3 hours and you haven't even begun to prepare anything.

The original recipe is made with a beautiful pate scuree but I find when I am in a pinch a commercially prepared roll out pie dough works equally as well and saves a LOT of time.

This tart is unusual because it is like baked apples in creme brulee (minus the crunchy sugar top).  It is best served while still warm and is wonderful with a cup of dark french roast coffee.  The entire recipe can be thrown together in about an hour from beginning to end (including 45 minutes of baking time).

Warm Apple and Cream Tart
serves 6-8

1 commercially-prepared 9-inch pie crust (or your favorite pastry dough)
2 large apples, peeled, cored and cut into thick wedges (Golden Delicious or Honey Crisp apples work particularly well)
3 egg yolks
1/2 cup heavy cream
4 Tbsp Turbinado sugar, plus 2 additional Tbsp for garnish (or granulated sugar)

Preheat oven to 375F.

Line a 8-inch metal tart pan with removable bottom with the pie dough.

Place the apple wedges in the pie shell.

In a medium bowl combine egg yolks, cream and 4 Tbsp sugar.  Whisk to combine.

Pour cream mixture over apples until it comes within 1/8 inch of the top of the shell (you may not be able to use all of the cream mixture depending on the size of your apples).

Sprinkle the top of the tart with the remaining 2 Tbsp sugar.

Bake for 45 minutes until tart is very golden and custard is set.

Cool 10 minutes before removing from tart pan.  Serve warm.


Jalapeno Cranberry Jelly


This year we planted a victory garden and we had a bumper crop of jalapeno peppers.  What to do with all this spicy goodness?  We decided to make a Pepper Jelly.

This pepper jelly is absolutely delicious and is particularly well-suited to be served as part of a cheese plate.  It is sweet and spicy, but not overpoweringly hot.  If you are one of those people who like a little more heat in your jelly, just add a few more of the seeds from the peppers (I removed them all).

A couple tools will make this project much easier.  A food processor fit with the chopping blade makes easy work of mincing the jalapeno peppers and cranberries.  A good digital kitchen scale is invaluable in weighing the pectin powder (use a large coffee filter as a weighing boat).  You also will want to get a large mouth funnel for filling the jars and an apparatus to lower and remove the jars to and from the boiling water bath.  Both of these can usually be found in the grocery store where you find canning supplies.

I used some red food coloring to give my pepper jelly a nice cranberry color, but this is completely optional.

This is not a difficult recipe, but takes some planning.  Before you make the jelly, all the canning jars should be sterilized (the dishwasher does a great job of this), the lids and rings should be boiled and a workstation should be set up.  This is much easier with two people too, so see if you can enlist the assistance of a helper. I would offer my partner Doug, who is an incredible organizer, but he can be grumpy if you don't keep him supplied with a fresh cocktail all the time.

Jalapeno Cranberry Jelly
makes about 24 half-pint jars

4 cups seeded, finely chopped jalapeno peppers (food processor does a great job of chopping)
1 pound cranberries finely chopped
1 cup cranberry juice
2 cups cider vinegar
red food coloring (optional)
5.4 oz pectin powder
15 cups granulated sugar (yes, 15 cups!)

In a large stock pot, combine peppers, cranberries, cranberry juice and vinegar and heat over medium high heat.

While heating the jelly, slowly add the pectin powder and red food coloring ,stir until well mixed.  While stirring, cook the jelly until the mixture comes to a boil.

Add the sugar and stir over medium high heat until mixture returns to a boil.

Distribute hot jelly among sterilized jars, leaving a 1/2 inch space at the top of the jars.  Place lids on jars and secure with rings.

Filling the jars with "lava-hot" molten jam is much easier with a wide-mouthed funnel

Submerge jars in a large pot of boiling water and boil for 10 minutes.  Remove jars from boiling water bath and cool on a towel.  Lids will "pop" as they cool.  Tighten the rings once cool.

Once the jelly has cooled, give the lids another tightening

Store in a cool dry place until ready to serve.  This makes an excellent hostess gift with a wedge of triple creme brie and some fancy crackers!


Tuesday, November 27, 2012

Sea Salt Caramels


Today is my good friend Candace's birthday and I discovered yesterday that she loves salted caramel.  Well of course I had to come home and whip some of these up for her birthday!

These are the perfect thing to make around the holidays.  They are incredibly delicious and taste just like the fancy french sea salt caramels you pay and arm and a leg for at higher end food shops.  If you can keep yourself from eating them all, they make a terrific gift.

This recipe only requires one incredibly important culinary skill: patience.

Follow this recipe exactly and you will be rewarded.  Give in to your impatience and you will be punished with something unpleasant, like runny caramels.  Trust me on this.  I speak from experience.

This is also a good time to go ahead and splurge on fancy European butter.  There is a reason it costs more than the generic brand.  It is a superior product.  Remember, these are an indulgence, so INDULGE!

Here are some questions that you may find yourself wondering while preparing this recipe (and the answers).

1.  Can I use margarine?  No. Are you insane?

2.  Can I use vanilla extract?  No. Remember this is an indulgence, use the real thing, you'll be glad you did.

3.  Can I just turn the temperature up to reduce the cooking time? No. The trick to these caramels is to let the caramel form slowly and most importantly, evenly.  Too high of a temperature will cause you to overshoot your temperature and ruin your caramel.

4. Do I really have to stir this the entire time? Yes.  Before beginning, make yourself a tall drink.  Get a stool.  Put on some music you really really like. Keep the phone next to you in case someone calls.  This recipe will not be ignored Dan (ala Glenn Close in Fatal attraction).  Once you begin cooking, you are committed to the entire process.  As it cooks the mixture will change volume several times as it goes through changes in the molecular structure of the sugar.  You must keep stirring, slowly to keep heat distribution even and to prevent the caramel from boiling over.  (Remember how much you spent on that butter and vanilla bean?  You don't want that to end up sticking all over your stove do you?)

5. Do I absolutely need a candy thermometer? Yes.  This is more chemistry than cooking.  Chemistry is about precision, and so is candy making.

6.  I'm bored and tired of stirring, does it really have to be 245 degrees? Yes.  Stop whining.  This is supposed to be fun.  Maybe you should have put more bourbon in that drink.  If you don't get the caramel to the correct temperature, your caramel will be runny.  Sit back and think of how much everyone is going to enjoy your sacrifice.

7. Do I really need to wait 8 hours before cutting the caramel? Yes.  Patience will be rewarded with easier cutting and handling of the finished product.  If you are tempted to cut early, put a large thick rubber band on your wrist and SNAP it hard.

OK.  Now that we see eye to eye, it's time to get in the kitchen and make something AMAZING!

Sea Salt Caramels
makes about 7 dozen

1/2 pound best quality unsalted butter (I like Plugra)
2 1/2 cups granulated sugar
1 cup light corn syrup
1 cup heavy cream
1 vanilla bean, split length-wise and seeds scraped
1 Tbsp best quality coarse sea salt (I prefer grey salt)

Line a 9 x 13 pan with aluminum foil and spray with vegetable oil.

In a large heavy saucepan melt butter over medium high heat.  Once melted, add sugar, corn syrup and cream.  Stir with a wooden spoon until sugar is dissolved and mixture just comes to a boil.

Immediately reduce heat to medium low and continue to cook mixture ON MEDIUM LOW HEAT, stirring slowly, but constantly until the mixture is a golden caramel color and has reached the firm ball stage ( 245 degrees F).  Depending on your stove, this will take about 1 - 1 1/2 hours.

Once caramel has reached 245 F, remove from heat and stir in the sea salt.  Pour into prepared pan.

Let caramel rest overnight or at least 8 hours before inverting onto a cutting board.  Remove foil and cut into 1-inch strips. Cut strips crosswise to make 1-inch squares.  Wrap in wax paper and store at room temperature.

The mixture comes to a boil, time to reduce the temperature to medium low...


 At 10 minutes the first change in volume, this will happen again and again...


 After 30 minutes the color begins to change


At 45 minutes the caramel color is really developing...

At one hour the mixture is really bubbling, but the temperature is still too low...

FINALLY! After 90 minutes of stirring, the correct
 temperature of 245 (Firm Ball) is achieved

After adding the sea salt, the caramel is poured into a foil-lined pan to firm up.

Cut into 1-inch squares and wrap in wax paper!