Tuesday, July 9, 2024

Salted Caramel Peanut Baklava

 Salted Caramel Peanut Baklava


I made this for Emma’s birthday.  Terrific twist on baklava- tastes like a very upscale Snickers bar.

Syrup: 

600 grams granulated sugar

400 grams water

1 1/2 tsp kosher salt

1/2 tsp vanilla


In a heavy medium saucepan combine sugar with 150 grams water. Bring to a boil over high heat and cook until bubbles subside and syrup is amber in color. Remove from heat.


Bring remaining 250 grams water to a boil, and carefully pour into the hot caramel. It will sputter and bubble violently.  Stir to combine, and add salt.  Allow to cool completely to room temperature. Add vanilla to cooled syrup.


Baklava:

1/2 package filo dough

400 grams chopped honey roasted peanuts

2 sticks melted unsalted butter


8oz semi sweet chocolate, melted.


Assemble baklava:


A word about working with filo dough. Filo dough dries out very quickly, so you must keep completely covered the entire time.


Thaw filo in refrigerator overnight. Then bring to room temperature. Open packaging and unroll filo on a clean DRY surface ( moisture is the enemy!).  Cover unrolled filo with a clean dry kitchen towel, and the cover again with a clean damp kitchen towel that has been wrung out.


When working with filo, fold back both layers of towels together, remove a single sheet, and then recover immediately to prevent drying out. If dough tears, it’s not a big deal, just piece sheet together in pan.


Pre heat oven to 350° F.


In a 9x13 pan, paint bottom and sides with melted butter.  Working one sheet at a time, place a sheet of filo evenly in the pan and paint with melted butter. Repeat until you have built 7 layers.


Spread chopped nuts evenly over the layered filo, then repeat layering and buttering until you have seven layers on top. Pour remaining butter over baklava.


With a very sharp knife, cut baklava into 36 pieces, using an up and down sawing motion and making certain to cut all the way through the bottom layer.


Bake 40 minutes @ 350°F, remove from oven and pour cool syrup over hot baklava, cool, drizzle with melted chocolate, serve @room temp.

Honey Peach Crostata

 Honey-Peach Crostata


At long last, I have finally written down my recipe for this rustic peach pie. I have been making this for decades and it is absolutely my favorite summertime dessert when peaches are at their peak.

The crust is a pâté sucree that I add two egg yolks to.  This causes the pastry to puff up a little and have a softer texture, like a very buttery sugar cookie.  

To prevent the crostata from leaking, the fruit never comes in contact with sugar, which prevents it from weeping and becoming soggy.  Instead, sugar and flour are mixed together on the bottom crust, and the fruit is layered on top.  As it bakes, the fruit releases its juice which are absorbed by the flour/sugar foundation, making a beautiful jammy base atop a crisp sugar cookie-like crust.


This is my absolute favorite summer dessert made with the ripest peaches I can find.


Honey- Peach Crostata 

Crust:

2 cups all purpose flour

 1/2 cup sugar

1/2 tsp salt

8 Tbsp cold unsalted butter, cut into small cubes

2 egg yolks

Water


Filling:

4 peaches, peeled and cut into 8 wedges

1/2 cup all purpose flour

1/3 cup sugar

4 Tbsp unsalted salted butter

1/4 cup honey


Finishing:

1 Egg yolk mixed with 1Tbsp heavy cream

Sparkling sugar


Combine flour, sugar and salt in a bowl and whisk briefly to combine. Add butter and work butter into flour mixture with your fingertips until a coarse meal-like consistency is achieved.


Mix 2 egg yolks with 2 Tbsp water, and add to flour mixture. With your finger tips begin to work the liquid into the flour, add ingredients more water as needed to form a somewhat cohesive non-sticky dough.  Flatten to a disc, wrap in plastic wrap and refrigerate for at least two hours.


Preheat oven to 400°F.


To peel the peaches, bring a medium sized pot of water to a bowl. Cut each peach in half and remove the pit.  Plunge the peach halves into the boiling water a few at a time. Poach for 30 seconds, then remove with a slotted spoon to a bowl.  Allow to cool to rem temp. Slip the skin off the peache with your fingers and discard.


Remove dough from refrigerator and allow to soften room temperature while oven pre-heats.


On a lightly floured surface, roll out dough to a 14-inch circle.  Slide dough circle onto parchment paper, and then slide parchment paper onto a baking sheet.


Combine flour and sugar, and then pour onto dough, creating a circle with about a 3-4 inch perimeter of plain dough. Arrange peach slices atop flour. Drizzle peaches with honey, and top with pats of butter.


Using the parchment as an aid, gently fold the perimeter over the top, making small pleats as you go around the entire circle.  Be careful not to tear the dough.


Brush the top and side crusts with the egg and cream wash, then sprinkle generously with sparkling sugar.


Bake for 30 minutes until golden brown.  Remove from oven and let crostata rest for at least 30 minutes before slicing. Serve with vanilla ice cream.


Saturday, June 10, 2023

Sheboygan Hard Rolls


If you know, you know.

Nothing makes a grilled Bratwurst or cheese steak taste better than putting it on a Sheboygan Hard Roll.  They are simply the best. Light, crusty, full of flavor, nothing even compares. The best ones come from Johnston’s Bakery or City Bakery in Sheboygan Wisconsin.

Unfortunately I live 1000 miles away from Sheboygan WI and can only get them by mail order, which is good, but I want them fresh from the oven and that means learning to make them myself.

This summer I set out on a quest to develop a recipe for authentic bakery-style hard rolls for the home baker.  I began with a recipe for German Brötchen, a fussy recipe that involves making an overnight poolish, and then many hours of prep the following day.  The result was beautiful, tasty and wrong.  The rolls were too dense, and just didn’t have the right flavor.  Back to the drawing board.

A friend of mine Corrine Heyeck, suggested that I join a Facebook group called Artisan Bread Bakers, for further research. I travelled down several rabbit holes in this excellent group and eventually found the recipe that would serve as my base recipe.

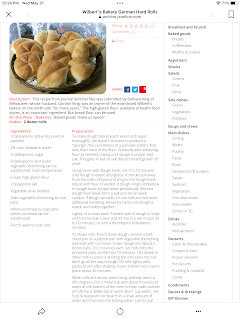
The base recipe was found in the Milwaukee Journel Sentinel archives and was glitchy and slow loading.  Thankfully I snagged a screenshot of the original recipe.

I made this recipe and EUREKA! It was exactly what I had been looking for! Sheer perfection!  The inside was light and cottony, with a paper thin crusty shell, that eventually became soft.  These rolls do not remain crunchy, but respond well to a light toasting on a baking stone or grill (that’s how it’s done in WI).

The original recipe needed a little work to get it ready for a home baker to produce consistent results. First of all the recipe calls for “high gluten flour “ which is t readily available to most home bakers.  High gluten flour has 14% protein.  In order to remedy this, I added vital wheat gluten (VWG) to bring my flour up to 14%.  This required a little math and you will likely have to do the same unless you are using the flour I used: King Arthur Bread Flour.


King Arthur Bread Flour is 12.7% gluten.  This means that in every 100grams of flour, 12.7 of those grams are gluten.  If I add 1.3grams of  VWG for every 100 grams of bread flour I use, for a recipe calling for 500grams of high gluten flour, I would use 500 grams Bread flour plus  5 x 1.3 grams VWG, or 6.5 grams.

If your base flour is a different % protein, you will need to make the calculations for yourself and modify the recipe accordingly.

Secondly, the recipe called for “scoop and sweep” measurements which opens the door to tremendous variation.  I converted everything to metric measurements which will improve consistency.

Next, I added 2 tsp diastatic malt.  The enzymes in the malt assist in helping the yeast process the flour and release more gluten, for a higher rise, as well as adds incredible flavor, aroma and color.

I used instant rapid rise yeast for this recipe and have not tested any other types of yeast yet to see if they also produce the same results. My guess is that they will require longer proofing times, but as of to day June 11, 2023, I have not yet tested them.

Lastly a word about water and hydration. To ensure you get the loftiest rise possible, it’s a good idea to use bottled spring water.  Tap water or city water is treated with chemicals that inhibit the yeast development.  This is the same reason the recipe instructs adding the sat AFTER the dough is fully formed in the mixing bowl- salt inhibits yeast.  The hydration for this bread is 74%.  Hydration is simply a measure of the weight of the flour compared to the water in this recipe. The higher the hydration, the more holes you have in the bread. 

Do not skimp on the 12-minute kneading time, you want to develop all that gluten!  Keep a small bowl of flour and another of spring water for final adjustments to the dough.  As you get more adept with this recipe you will begin to know what the dough should look like and how to tweak it to get there.

Another trick I used was to oil a coat hanger that has a wooden dowel on the horizontal bar to make the indentations in the dough. Super easy.


Sheboygan Hard rolls

Flour 555g

Water 413g

Hydration 74%


500g King Arthur Baking flour (12.7% protein)

6.5 g Vital Wheat Gluten

2 tsp diastatic malt powder

370 g spring water ( not city or tap; 74% hydration)

3Tbsp unsalted butter ( or lard or vegetable shortening)

1 1/2 Tbsp instant rapid rise yeast

1 tsp table salt

Spray vegetable oil

Fine ground yellow cornmeal or semolina flour for dusting baking sheet

1/2 tsp corn starch dissolved in 1/2 tsp cold water

1 cup boiling water

Additional boiling water for steam


In the bowl of a stand mixer with the hook attachment combine flour, vital wheat gluten, diastatic malt powder, spring water, butter, and yeast. Mix on medium low speed until a dough begins to form. Add salt. Continue to knead on medium low for 12 minutes until a smooth, elastic and tacky dough forms. The dough should not stick to the sides of the bowl, but will stick to the bottom of the bowl.


After kneading, transfer dough to a lightly oiled container, cover with a kitchen towel and rise until quadrupled (30-60 minutes in my kitchen, yours will probably differ).


Preheat oven to 425° F. Place a baking stone on a shelf in the upper half of your oven.  On the rack directly below the baking stone, place a cast iron skillets this will receive boiling water for the steam bake.


Generously grease a half baking sheet with butter, and dust completely with cornmeal or semolina.


Gently deflate dough, and turn out on a very lightly floured surface


Divide the dough as equally as possible into 12 pieces. Form each piece onto a smooth ball of dough and place on prepared baking sheet. Spray rolls lightly with oil.


Lightly oil a 12- inch dowel and use it to press an indentation into the rolls, four at a time, pressing down firmly, but not cutting rolls in half.


Cover rolls with a kitchen towel and proof for about 45 minutes ( or until the rolls have dramatically risen at least doubling in volume) at room temp.  Again, different kitchens will require different proof times.


Bring a kettle of water to a boil.


After rolls have risen, uncover rolls. Combine corn starch and cold water, then pour into one cup of boiling water and stir until smooth. Brush rolls with starch wash immediately before putting in oven.


After putting buns in the oven, add 1 1/2 cups boiling water to cast iron skillet and immediately close oven. Bake for 5 minutes, then remove skillet of water. Continue to bake 13- 20 minutes until rolls are well risen, golden brown and sound hollow when thumped.


Remove rolls from oven and transfer them to a wire cooling rack to cool.  The rolls will become soft, which is what you want.


Serve same day, or put lukewarm rolls in a plastic bag and freeze while still tepid.


Sunday, January 8, 2023

Aunt Tannie’s Chocolate Cookies


 Another classic cookie post.


This recipe is legendary in my family.  These crispy/chewy chocolate cookies are simply known as Aunt Tannie’s Chocolate cookies.  Tannie Daane was my ex’s aunt on her father’s side and she was a marvelous baker who lived her entire life in Sheboygan Wisconsin.


The cookie is not too sweet and has a very dark chocolate flavor, almost reminiscent of an Oreo.  They are positively addicting.


Aunt Tannie’s Chocolate Cookies

Makes 5 dozen


1 1/4 cups butter, room temp

2 cups granulated sugar ( 200 g )

2 eggs, room temp

2 tsp vanilla extract

2 cups all purpose flour ( 240 g )

3/4 cup cocoa powder ( 90 g )

1 tsp baking soda

1/2 tsp salt.


Preheat oven to 350°F.

Combine butter and sugar in a stand mixer and cream with paddle attachment until light and fluffy ( about seven minutes). Add eggs and vanilla and cream until smooth.  

In a separate bowl combine remaining dry ingredients and whisk to blend. Add dry ingredients to creamed butter and mix on low speed until well-mixed.


Drop teaspoons of batter about 2 inches apart on parchment-lined baking sheet ( cookies will spread during baking).  Bake 8-9 minutes. DO NOT OVERBAKE.

Remove cookies from oven and let rest on sheet for one minute before removing to a wire cooling rack.

Monday, January 2, 2023

Poppy Seed Cookies


This is an old cookie recipe I haven’t made for decades, but I decided to make for Christmas this year.  The cookies are like a delicious crunchy yet tender shortbread, fragrant with vanilla, nuts and butter with a nice bite from dried ginger.  They are plain to look at but usually end up being the first cookie to disappear. They are absolutely divine with a cup of Earl Grey tea or a cup of coffee.  I think they should be made all year long, and I am resolved to make that happen in 2023.

I first tasted these cookies when I was. Ph.D. Student at Oak Ridge National Laboratories.  The recipe is from Diana M. Popp, who was the wife of the director of my graduate program, Dr, Raymond A. Popp.  My bestie in grad school, Jane Gallager Mural, worked in the Popp’s lab and often house-sat the Popp’s magnificent farm on the banks of the Clinch river in East Tennessee.

Diana was a talented mouse geneticist, amazing cook and fabulous hostess, and general “lab mom” for us students.

Here is the recipe:

Diana Popp’s Poppyseed Cookies

16 oz. Unsalted butter, room temperature 
1 cup granulated sugar
1 egg yolk
1 tsp vanilla extract
2 1/2 cups all purpose flour
1/2 tsp powdered dried ginger
1/4 tsp salt
1/2 cup poppy seeds
1/2 cup toasted, chopped pecans

Cream together butter and sugar until fluffy.  Add egg yolk and vanilla and cream until well-incorporated.

Combine flour, ginger, salt and poppy seeds in a separate bowl and whisk until blended.  

Add flour mixture to creamed butter and mix until combined. 

Add pecans and mix until well distributed through the dough.

Place the dough on a sheet of plastic wrap and shape into a  2-foot log, using plastic wrap to assist with rolling.

Wrap tightly and refrigerate until firm, about an hour.

Preheat oven to 325°F

Line a cookie sheet with parchment paper.  Cut log into 1/4 inch slices and place on cookie sheet at least 1 inch apart.

Bake for 12 minutes til cookies are just beginning to brown.  Cool completely on a rack.

https://www.researchgate.net/scientific-contributions/Diana-M-Popp-39844608


Sunday, November 8, 2015

Low carb Smoked Gouda "mac-n-cheese" made with Cauliflower


Well hello again!

It's been a while! While I have been gone I have been dealing with some medical issues. For one, I have developed diabetes, mainly due to my being overweight. This did not come as a huge surprise since diabetes runs in my family and  I suppose it was only a matter of time.

I have adopted a low carbohydrate lifestyle and in three months time I have lost nearly 25 pounds and have my diabetes under control enough that I no longer need to take my medications, PROVIDED I continue to follow my low carb lifestyle.

Yes folks, sugar really is the enemy. As you may, or may not be aware, carbohydrates are made from long chains of simple sugars like glucose, so every time you eat bread, pasta, rice or potatoes you are eating sugar. This can wreak havoc on your blood glucose. If you are a foodie like me, this can create quite a dilemma.

Luckily the answer lies in creative cooking with other ingredients that are naturally low in carbs. Things like the cauliflower in this dish make an excellent substitute for macaroni.  I have made pizza crust and risotto and "mashed potatoes" all with amazingly versatile cauliflower.

 The other good news is that we are beginning to understand that fat is not necessarily the enemy we once thought it was. This is not to say that you should sit down and consume a pound of butter, but that fat can be used to enhance the flavor and texture of low carb foods in a way that makes a low carb lifestyle not only doable, but, dare I say it, enjoyable!

As an added bonus, since gluten-free cooking and the paleo diet craze are so popular, low carb substitutes are easy to find in most grocery stores and the internet is chock full of recipes from folks like me thinking outside the culinary box. 

The key to this lifestyle is to keep things in perspective and enjoy indulgent dishes like this in moderation.  Do I eat this every week? No! But when the craving for mac-n-cheese comes knocking,why not enjoy a much healthier alternative! Learn to read nutrition labels on everything you buy, it's amazing how many hidden carbohydrates are in the food we eat, especially processed foods.

I have decided to reimagine many of my most popular recipes and the result has been delicious. Even picky eaters and vegetable haters love this rendition of Mama Ozzy's decadent cheesy baked pasta goodness.

This recipe is a compilation of the best tips and tricks I could find on the internet combined with Mama Ozzy's sensibilities for flavor! I hope you will try this terrific dish, healthy comfort food at it's finest!

Mama Ozzy's Smoked Gouda Cauliflower and Cheese
Serves 8

1 large head cauliflower, green parts removed and cut into small chunks
15 oz. ricotta cheese
8 oz. sour cream
1/2 cup heavy cream
1 egg 
3/4 tsp salt
1/2 tsp turmeric powder
1/2 tsp dry mustard
1/4 tsp ground nutmeg
1/4 tsp garlic powder
1/4 tsp smoked paprika
1/8 tsp cayenne pepper
8 oz shredded smoked Gouda cheese
16 oz shredded extra sharp cheddar cheese (reserve 1/2 cup for topping)
1/2 cup grated parmesan cheese
3 slices fried bacon, crumbled
1cup crushed fried pork rinds (chicharrones)

Place chopped cauliflower in a large glass bowl, cover with plastic wrap, and microwave on high power for 10 minutes. Let cauliflower rest, still covered, for 30 minutes to cool down.

Chop the cauliflower into small chunks, stems and all.


You should get about 8 cups of chopped cauliflower.

After microwaving, let the cauliflower steam for thirty minutes. The plastic wrap will shrink down to create a cool tight seal!

Pre heat oven to 350 F.

Empty the cauliflower into a clean cloth dish towel ( it will still be pretty hot) and carefully squeeze out as much liquid as possible.

After thirty minutes dump the cauliflower on a clean dish towel.

Twist the towel tightly over the sink to remove as much water as possible.

In another large bowl combine ricotta, sour cream, cream, egg, spices. 


Add all the cheeses and mix to combine. 


 Finally, add the squeezed cauliflower and fold until well blended.  Place in a 8x11 glass baking pan ( no need to grease).


Top with reserved cheese, crumbled bacon and pork rinds.  


Bake 45 minutes until bubbly and golden. Allow to rest for 15 minutes before serving.